Eighteen steps, one phone call, zero guesswork — from quote to submitted application while the client is on the line.
✓
Before You Start
One-minute pre-flight — every box, every call
1
Portal Setup
One-time · your One Healthcare ID
Step 1.1
Create your One Healthcare ID
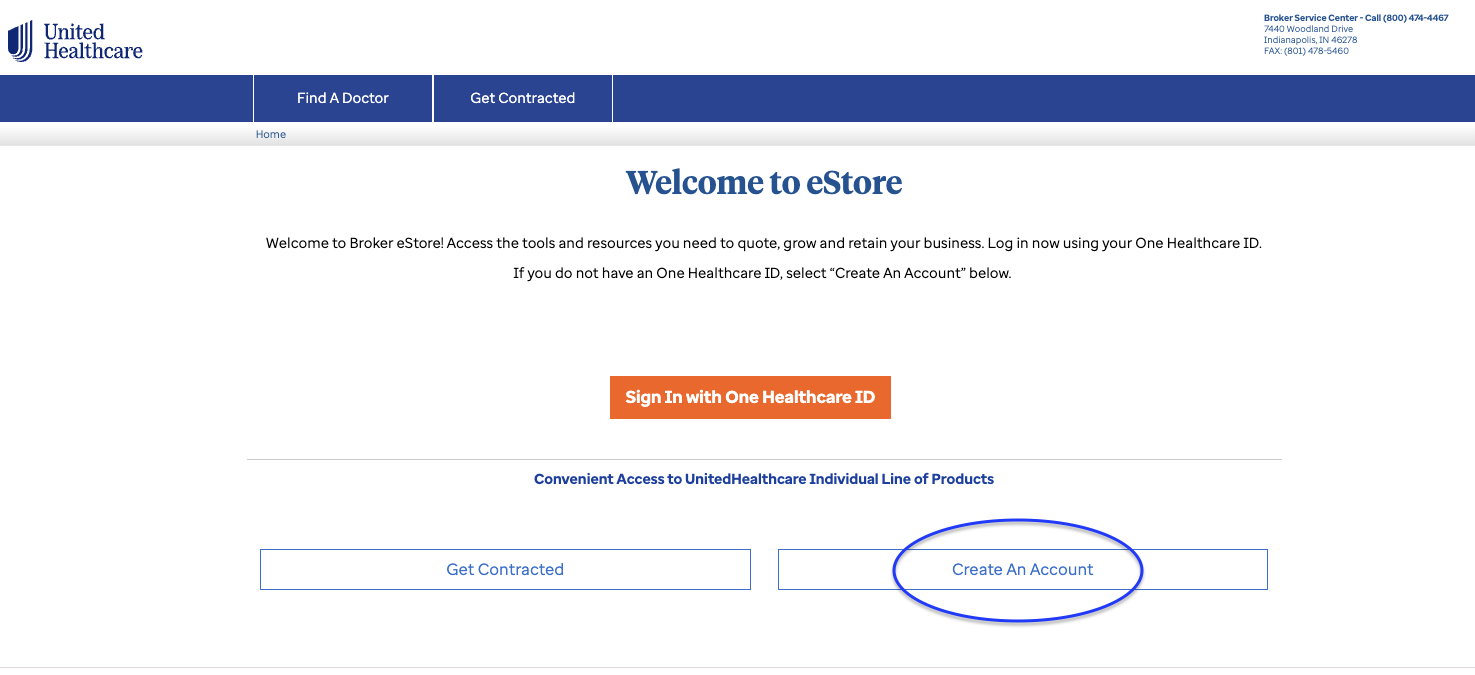
Go to uhone.com/broker → on the eStore welcome page click Create An Account → build your One Healthcare ID. Once created, use Sign In with One Healthcare ID.
You'll see"Welcome to eStore" with the orange sign-in button and Create An Account below it.
eStore welcome — Create An Account (circled)
💡 Pro tipSet all one-time passwords/codes to be sent by text to your cell — you'll trigger these constantly, and email codes slow every login.
Step 1.2
Log in
Sign in with your One Healthcare ID.
You'll seeThe broker dashboard — "Welcome [your name]!" with Get a Quote and My Business.
2
Quote
Applicants in, approved products selected
Step 2.1
Start the quote
Click the orange Get a Quote button.
Dashboard — Get a Quote (circled)
Step 2.2
Complete the applicant form
On "Let's get started," enter for every applicant: zip code, gender, date of birth, tobacco usage, and the TriTerm Weight Range (use View Ht/Wt Chart if unsure). Add family with + Add spouse / + Add child.
You'll seeCounty auto-fills from zip (e.g., 34105 → COLLIER).
Applicant form — zip/county + per-applicant details (circled)
💡 Pro tip — county overlapSome zips span multiple counties — confirm the client's county before proceeding. Rates and plan availability key off zip + county.
Step 2.3
Select plans to compare — the approved four only
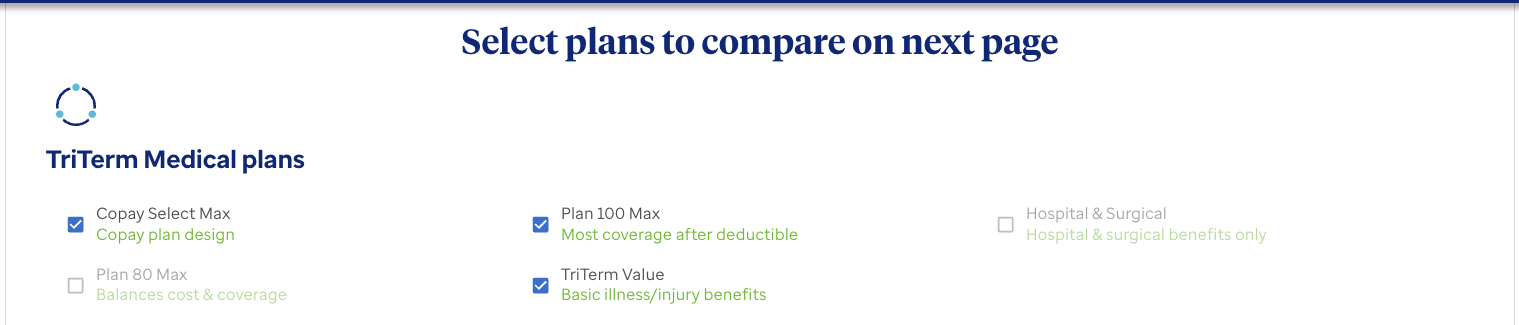
On "Select plans to compare on next page", check exactly these:
Portal section
Check
Leave unchecked
TriTerm Medical plans
Copay Select Max · Plan 100 Max · TriTerm Value
Plan 80 Max · Hospital & Surgical
Accident Pro Series
Accident ProGuard
ExpenseGuard · ProGap · ProGuard GI
TriTerm Medical — the three approved plans checkedAccident Pro Series — Accident ProGuard only
💡 Pro tipUHC's portfolio is vast — product discipline keeps your story consistent and your underwriting clean. Four products, every time.
3
Configure Plans
Side-by-side · deductibles · effective dates
Step 3.1
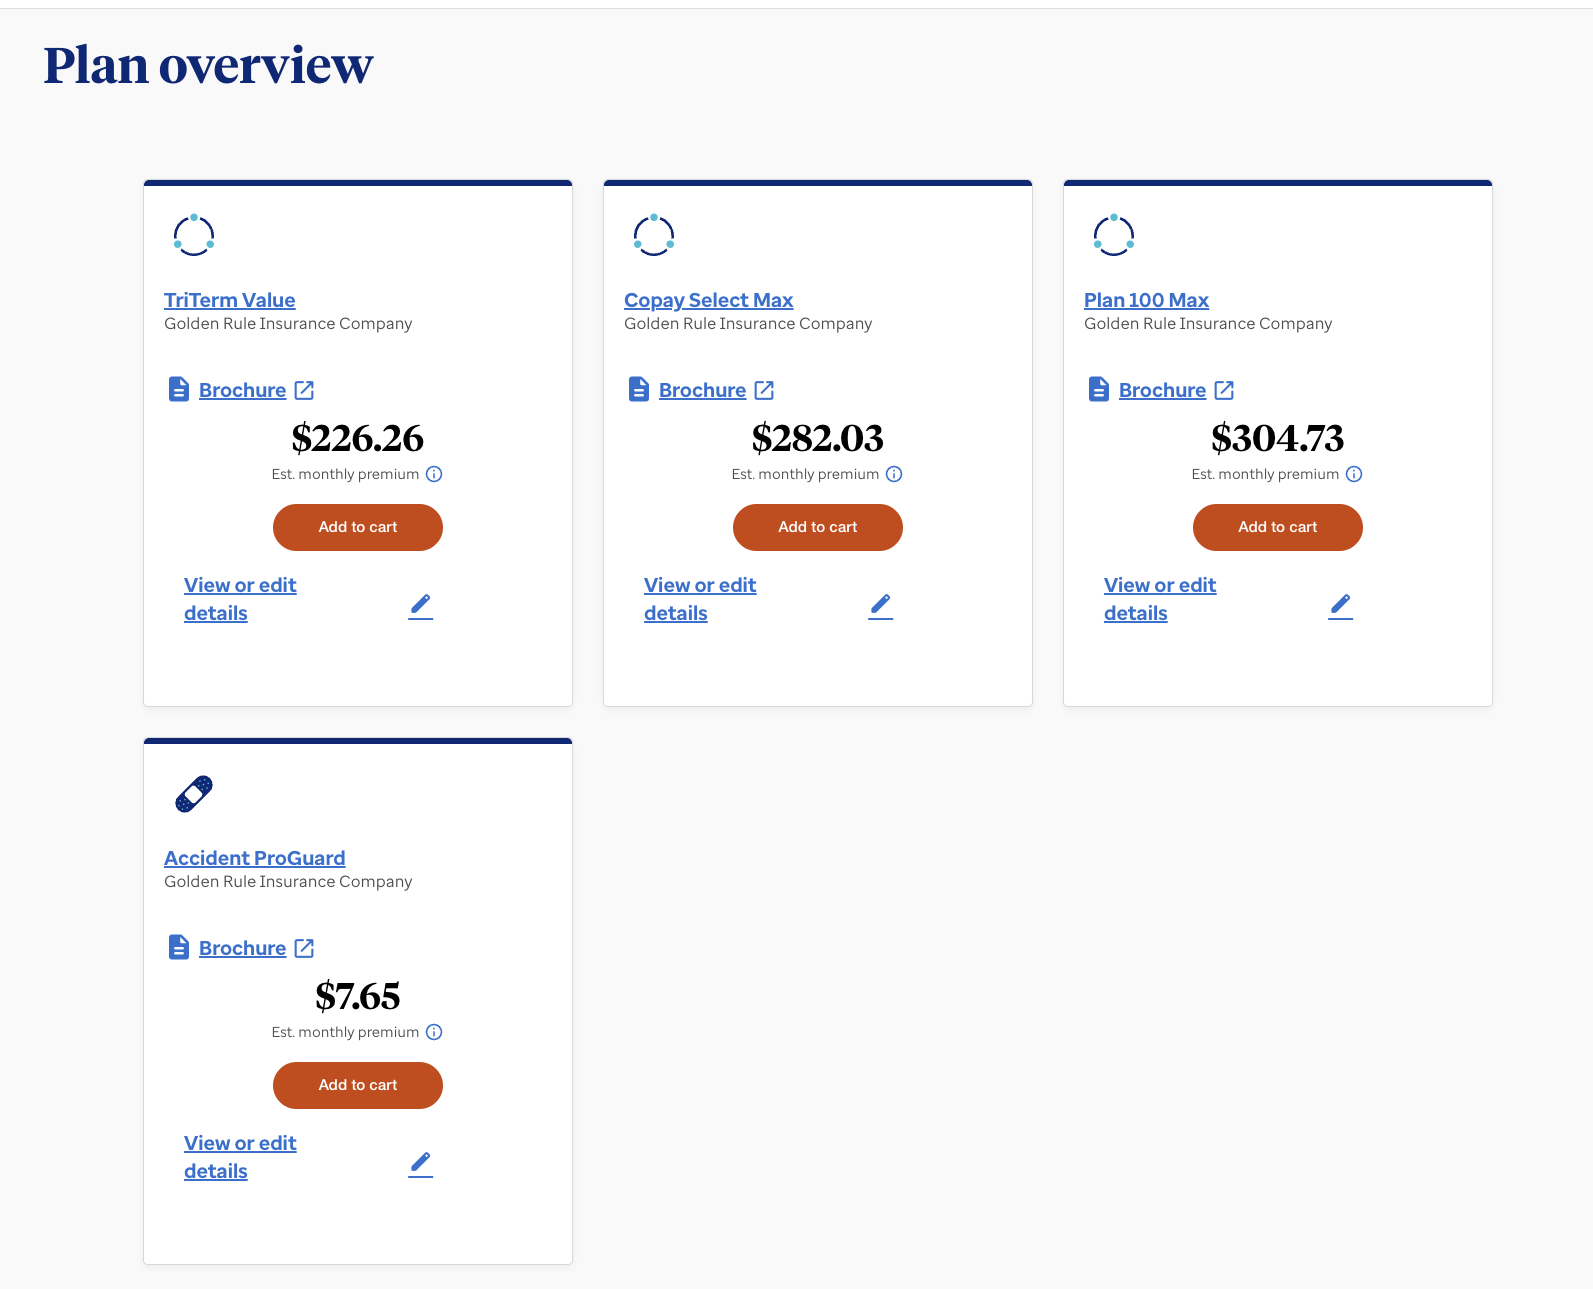
Review the plan overview
You'll seeA card per plan with estimated monthly premium and Add to cart — e.g., TriTerm Value $226.26 · Copay Select Max $282.03 · Plan 100 Max $304.73 · Accident ProGuard $7.65 (Golden Rule Insurance Company).
Plan overview — base premiums per plan
💡 Pro tipThese are base rates — fees come later. Quote out loud using the +$15 rule (Step 5.3) from the very first number you say.
Step 3.2
Open the side-by-side comparison
In the menu bar above the plan overview, click Health → then Short term health insurance - extended (that's TriTerm Medical — up to ~3 years of consecutive coverage).
Menu bar → Health → Short term health insurance - extended
Step 3.3
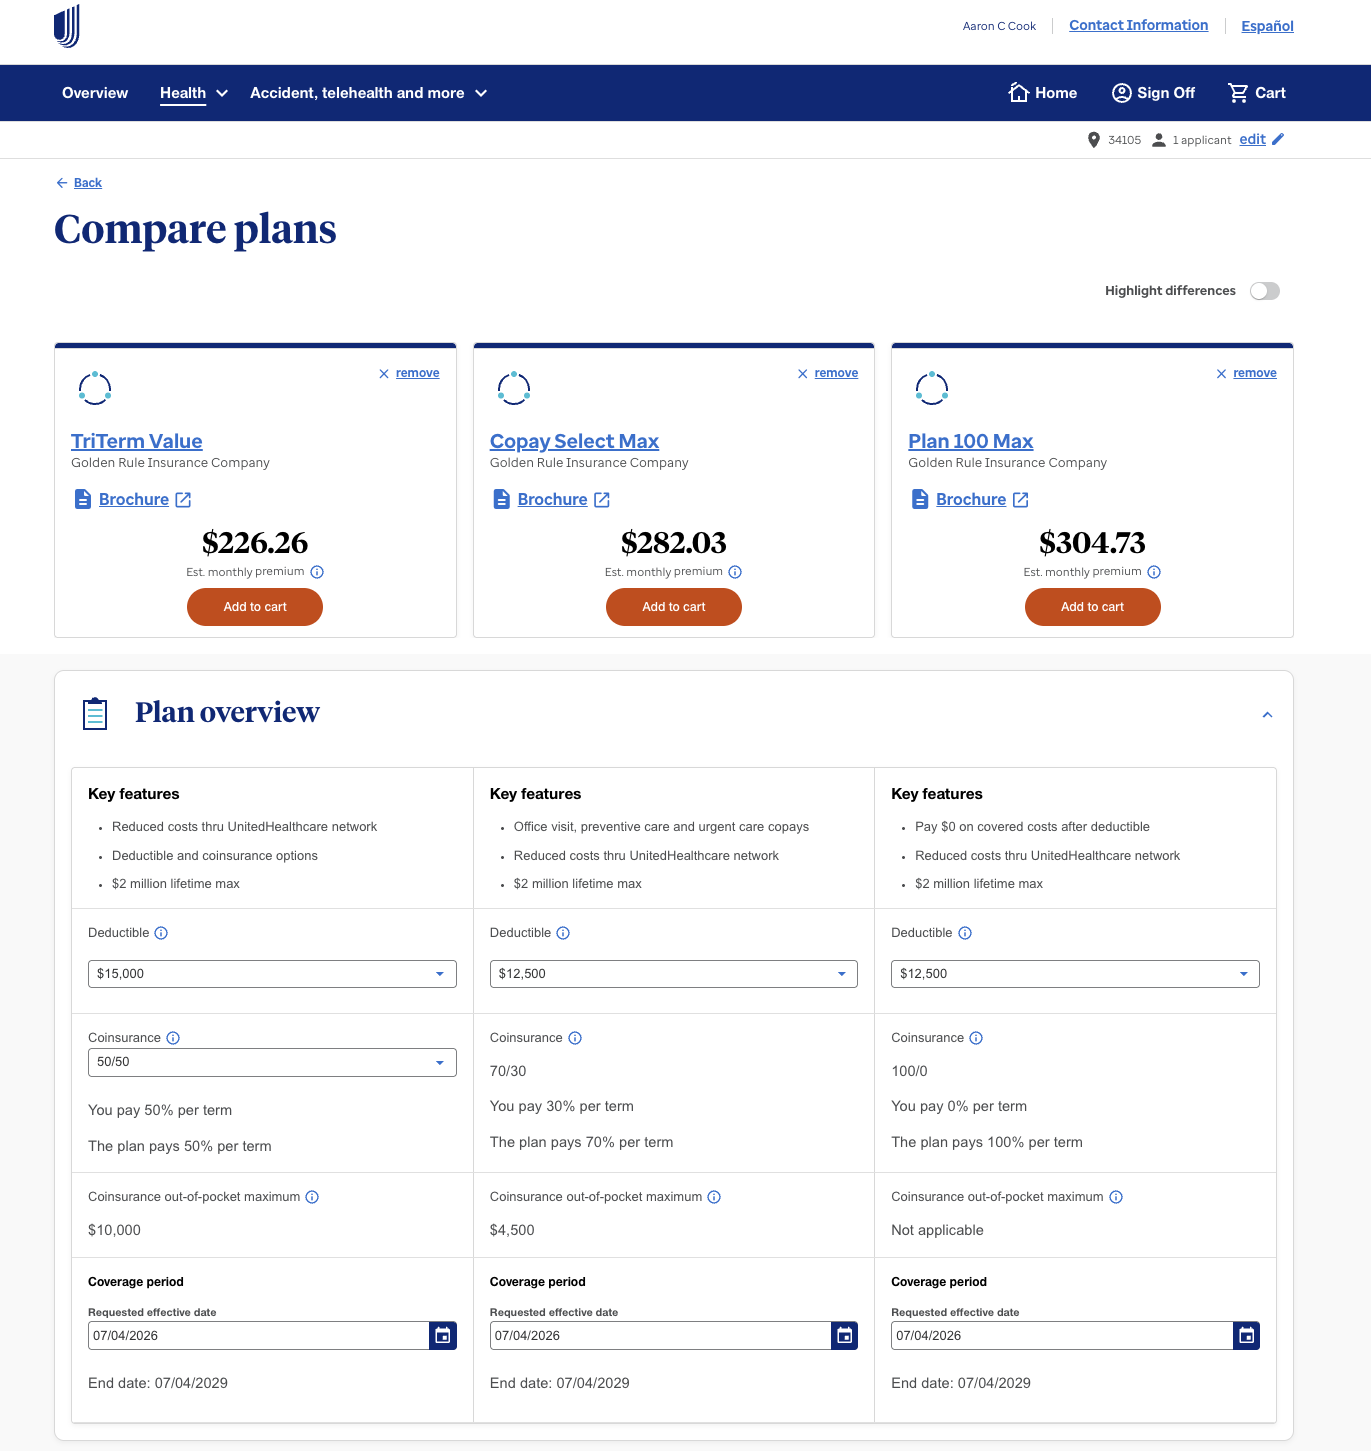
Set deductibles, coinsurance + effective dates
On Compare plans, adjust per plan: Deductible (dropdown), Coinsurance (50/50 · 70/30 · 100/0), and the Requested effective date (end date auto-sets ~3 years out).
Compare plans — three TriTerm plans side by side
💡 Pro tipThis screen is your comparison close — good/better/best. The Highlight differences toggle makes the contrast do the selling.
🗣 Talk track"Based on what you told me about your doctor visits and budget, here's the range that fits. Looking at these three, which feels closest to what you had in mind?"
4
Launch the E-App
⚠ The critical stage — signature method decides everything
Step 4.1
Add to cart
After all adjustments, click Add to cart on the chosen plan(s).
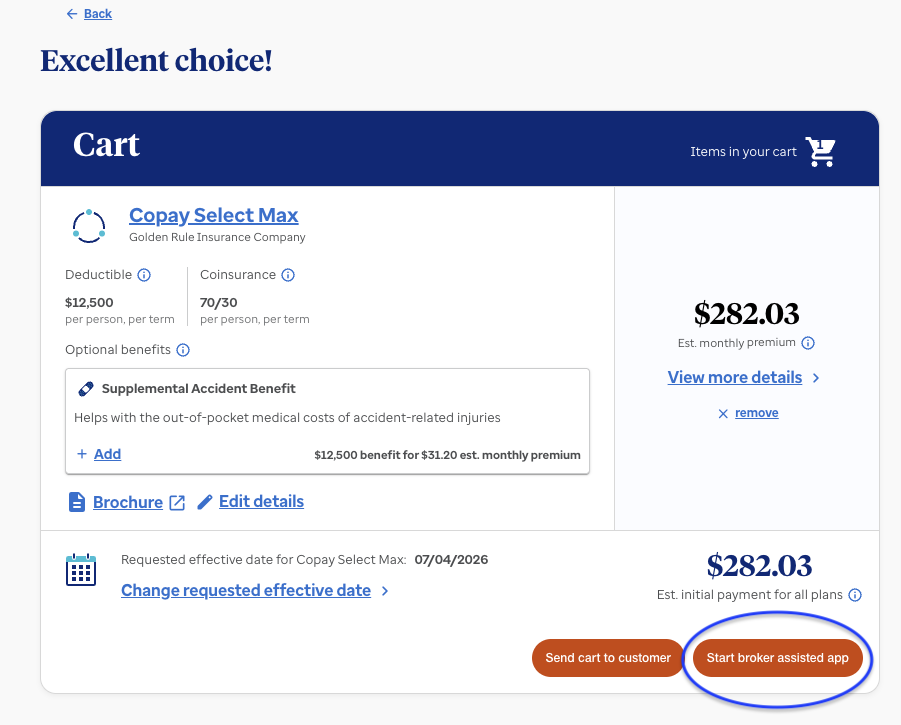
You'll seeThe Cart — "Excellent choice!" — with plan details, est. monthly premium, and the initial payment figure.
💡 Pro tipThe cart offers an optional Supplemental Accident Benefit add-on (e.g., $12,500 benefit for ~$31/mo) — know whether your client wants it before you get here.
Step 4.2
Start the broker-assisted app
In the cart, click Start broker assisted app — not "Send cart to customer," which emails the app away instead of keeping you in control.
Cart — Start broker assisted app (circled)
Step 4.3 · ⚠ critical
Pick the RIGHT signature method
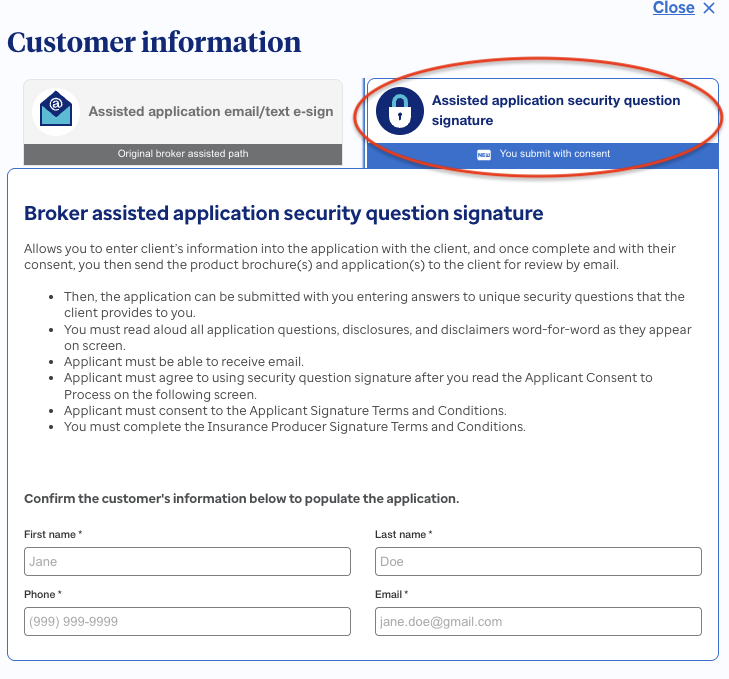
The Customer information panel shows two tabs. Click the tab on the right: Assisted application security question signature ("You submit with consent").
⚠ CriticalThe left tab ("Assisted application email/text e-sign") sends the app to the client to finish on their own. Wrong tab = no verbal app, no payment on your end — back out and restart.
🔒 Portal requirementsRead all application questions, disclosures, and disclaimers word-for-word as they appear on screen. The applicant must be able to receive email and must consent to the signature terms; you complete the producer signature terms.
Step 4.4
Confirm customer information
Enter the client's first name, last name, phone number, email → continue. This populates the application.
Step 4.5
Confirm the security-question requirements
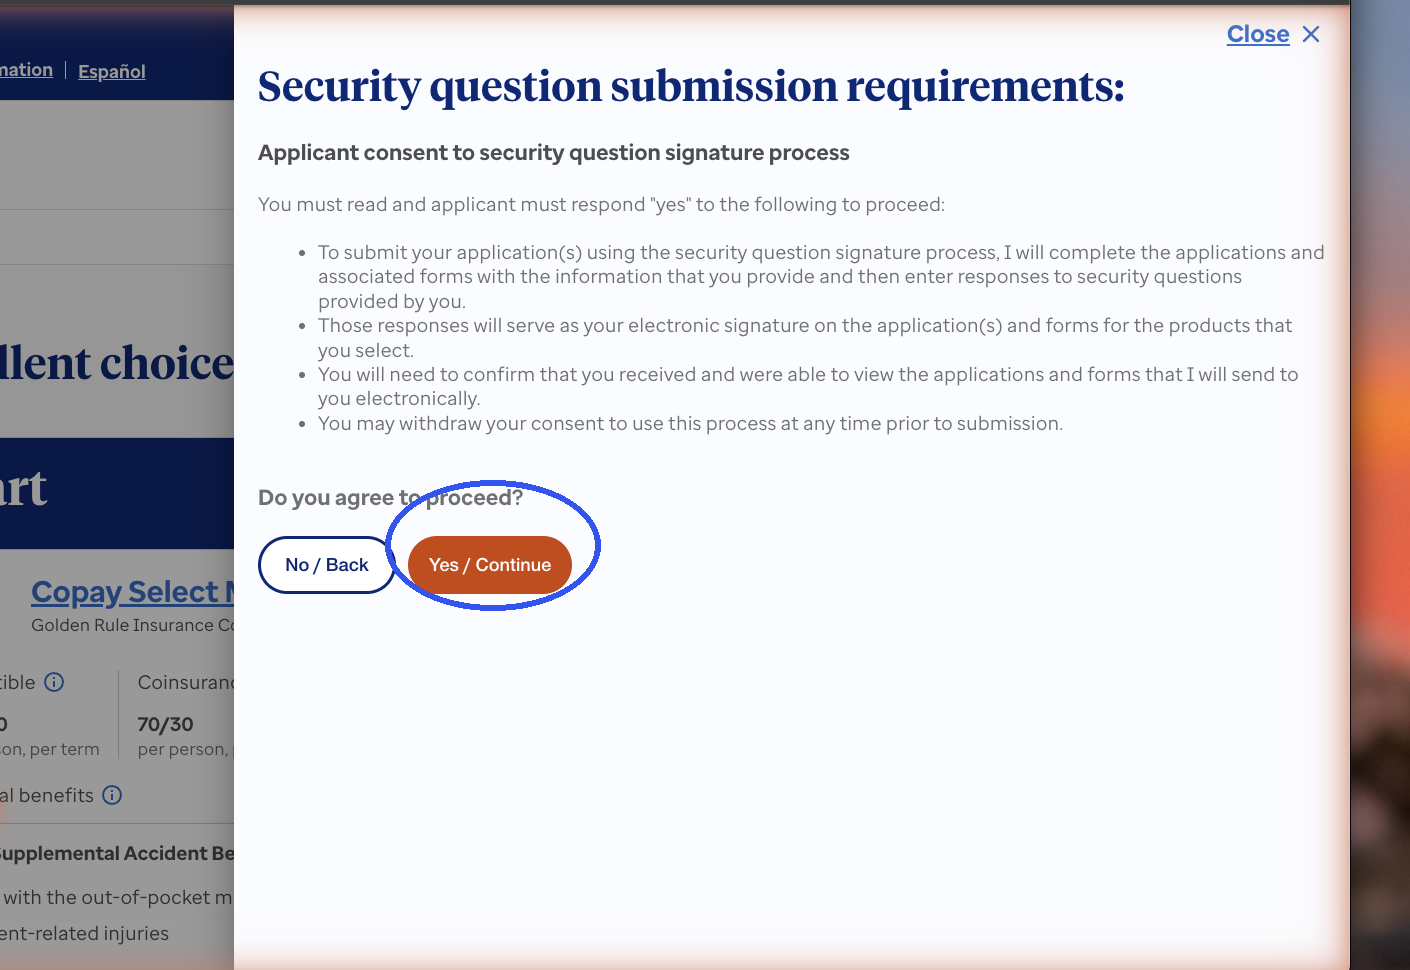
On the security question submission requirements pop-up → click Yes / Continue.
The consent pop-up — read the bullets aloud, client says yes, click Yes / Continue (circled)
5
Application + Payment
Verbatim questions · the fee math · bank draft
Step 5.1
Complete the applicant details
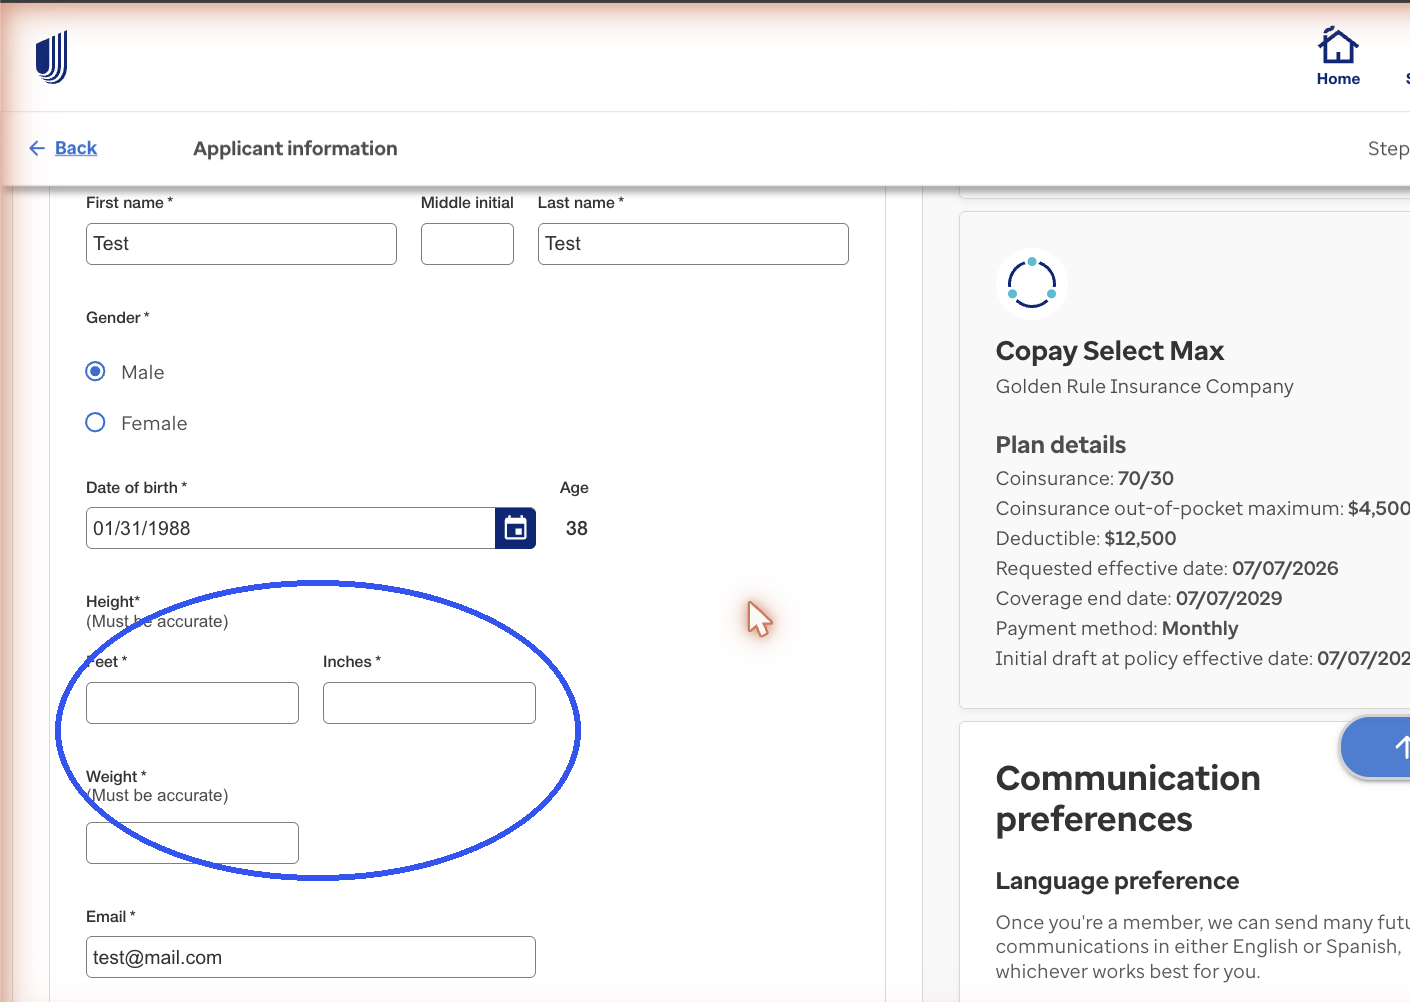
On Applicant Information (Step 1 of 4), fill the remaining fields: height, weight, resident address.
Applicant Information — height/weight (circled), address below; plan summary rides along on the right
💡 Pro tipUnusual addresses trigger a red banner: "address not found in our database." Re-verify with the client — if it's right, click Continue as entered and move on.
Step 5.2
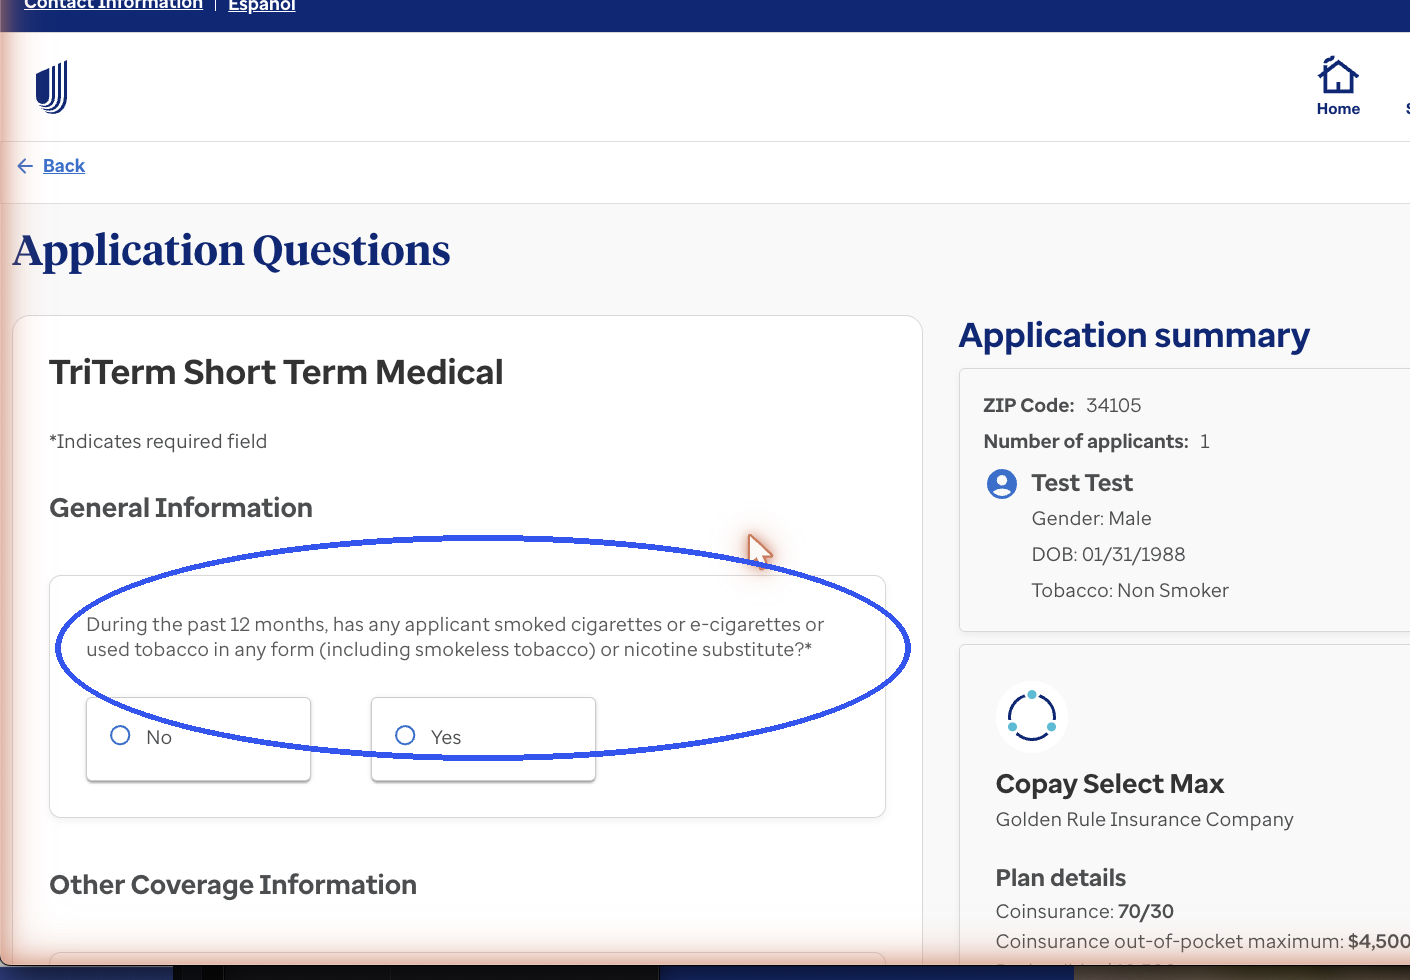
Health questions — read verbatim
Read every health question word-for-word; the client answers yes or no.
🗣 Talk track — setup"These next questions I'm required to read exactly as written — just answer honestly, yes or no. If anything needs a second look, we'll handle it together."
🔒 ComplianceHealth answers live in the carrier application only. Never paraphrase medical details into CRM notes, texts, or email. Never coach an answer.
Application Questions — read each one exactly as written (first question circled), client answers yes or no
Step 5.3
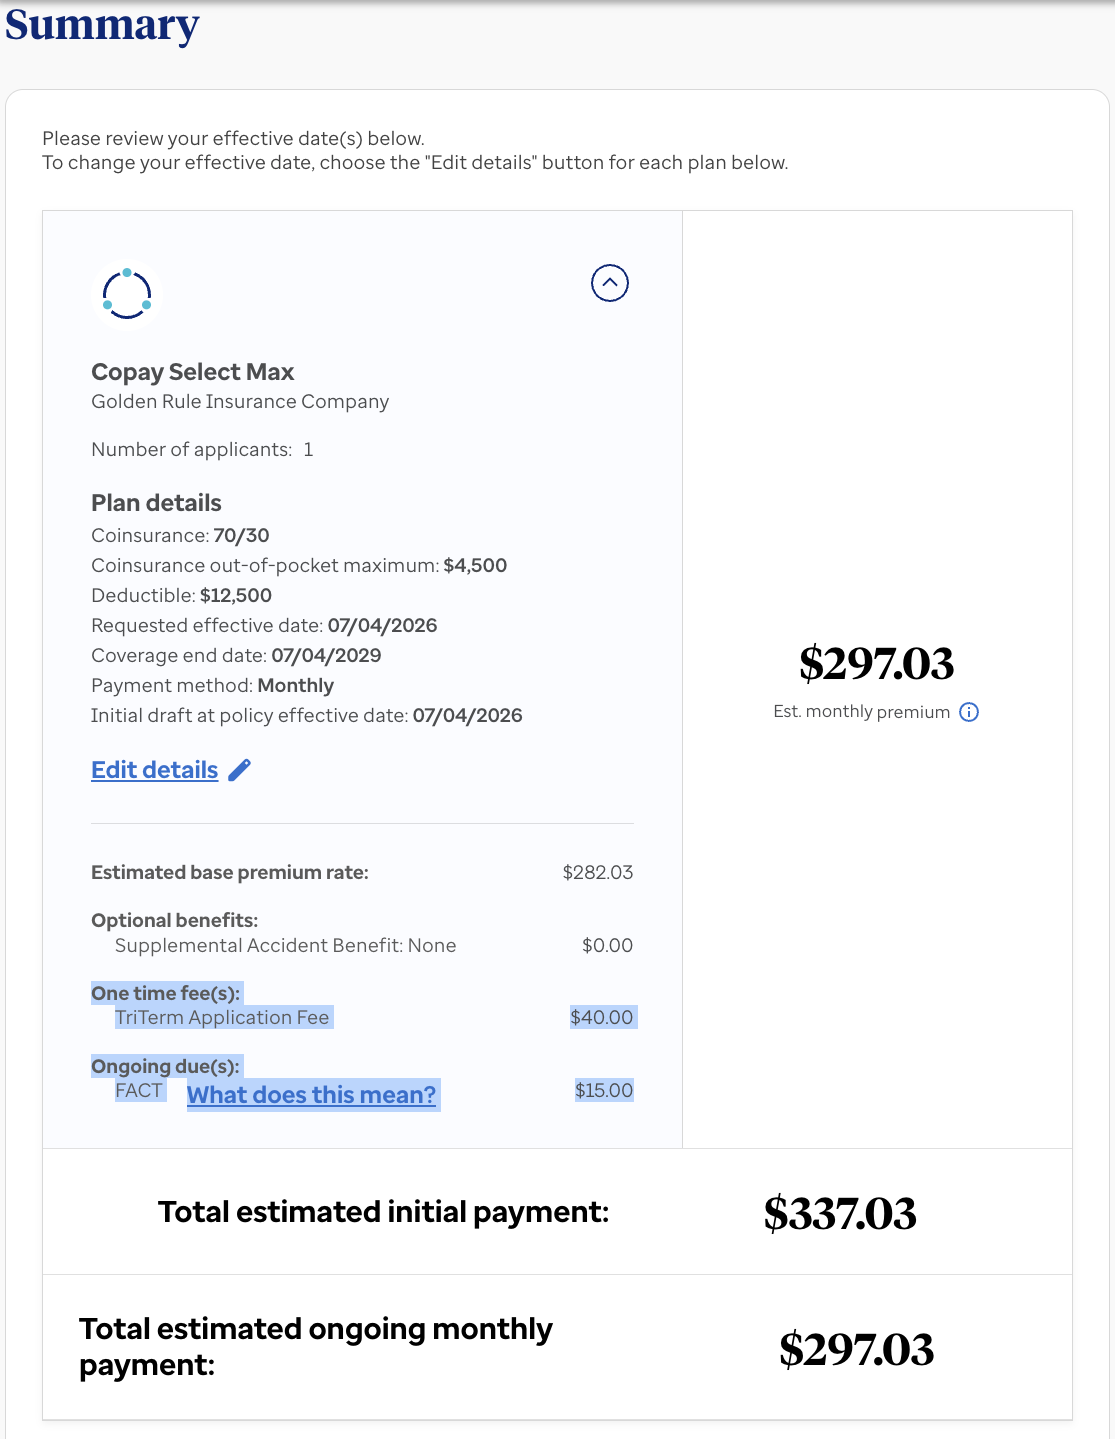
Summary page — know the fee math cold
You'll seePlan details, then the money section: base premium, One-time fee(s) and Ongoing due(s), rolled into initial + ongoing totals.
💡 The +$15 ruleAssume a FACT fee on every plan — the monthly number you quote out loud is always base premium + $15. And flag the one-time application fee so the higher first draft never surprises anyone.
🗣 Talk track — fee framing"Your monthly payment is $297 — I've already included the carrier's monthly fee in that. The very first draft is $337 because of a one-time application fee, then it's $297 every month after."
Step 5.4
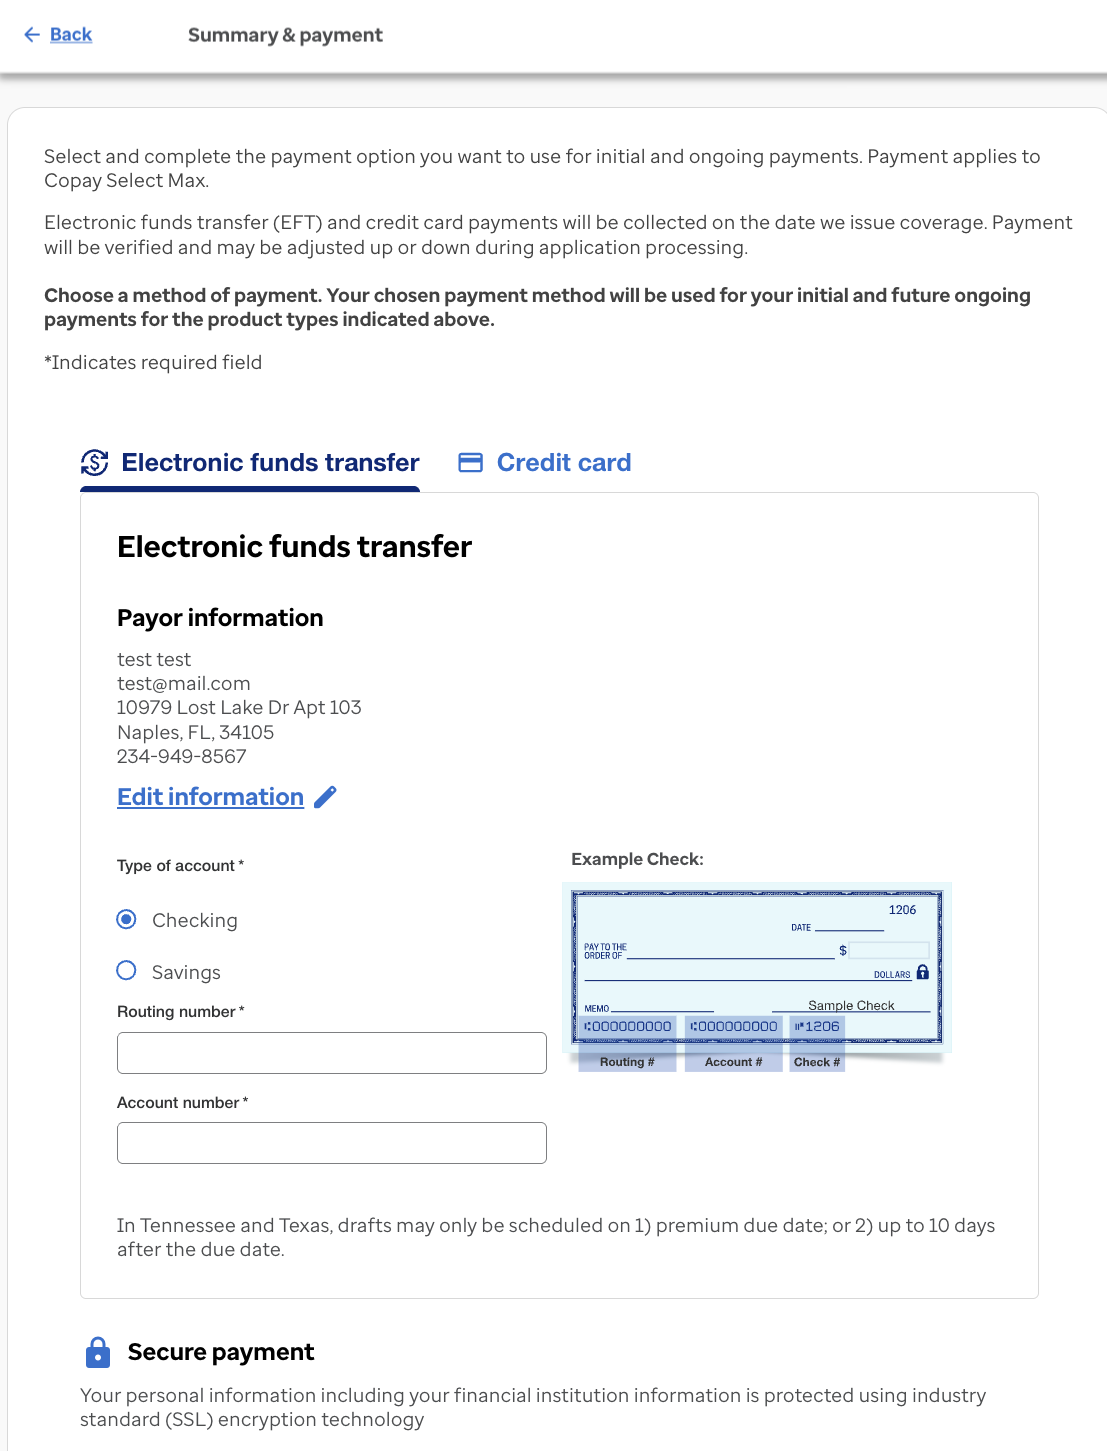
Payment — bank draft (EFT)
On Summary & payment, use the Electronic funds transfer tab. Select Checking or Savings, then collect and enter the routing number and account number verbally. The screen shows an example check locating both numbers.
Agency standardInitial and ongoing payments run by bank draft.
Summary & payment — EFT with example check
🗣 Talk track — assumptive ask"Payments run on a simple bank draft. Grab a check or open your banking app — read me the routing number first, then the account number, and I'll set it up while we're together."
🔒 PCI — non-negotiableBanking numbers get keyed into the UHC application screen only. Never into the CRM, notes, texts, or email. If a client texts them unprompted: delete the message and redirect to voice.
💡 TN/TX noteIn Tennessee and Texas, drafts may only be scheduled on the premium due date or up to 10 days after (on-screen portal rule).
6
Submit + Log
Underwriting · policy number · CRM hygiene
Step 6.1
Submit for underwriting
After payment info, click Next and follow the remaining on-screen prompts to fully submit to UHC for official underwriting and review.
Step 6.2
Confirmation page — relay the policy number
You'll seeNext steps + policy number(s) for every application submitted. Read them to the client and set expectations.
🗣 Talk track — close"You're officially submitted — write this policy number down: ___. Underwriting reviews it from here, and I stay on it until you're approved and your documents are in hand."
No screenshot for this one — the page only exists after a real submission. You'll recognize it: policy number(s) + next steps.